1. Open Outlook 2019. If this is the first time you have opened Outlook you will be directed to the new account wizard. If you already have an account set up, click File, then Add account and continue to step 2.
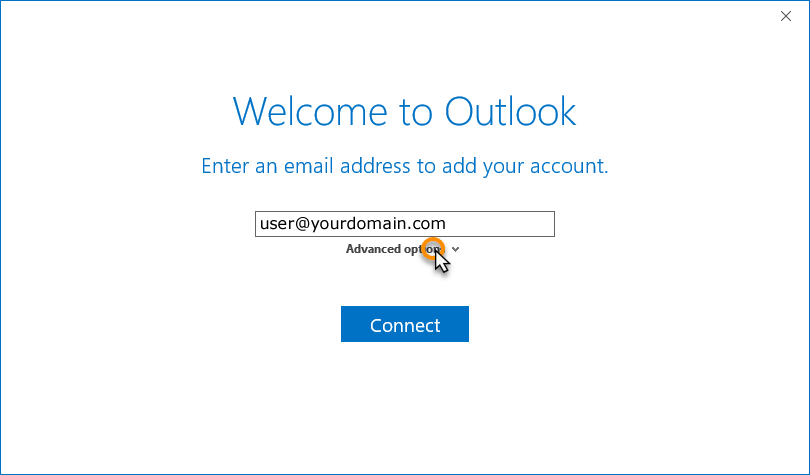
2. When the Welcome to Outlook 2019 box opens, enter your email address and click Advanced options.
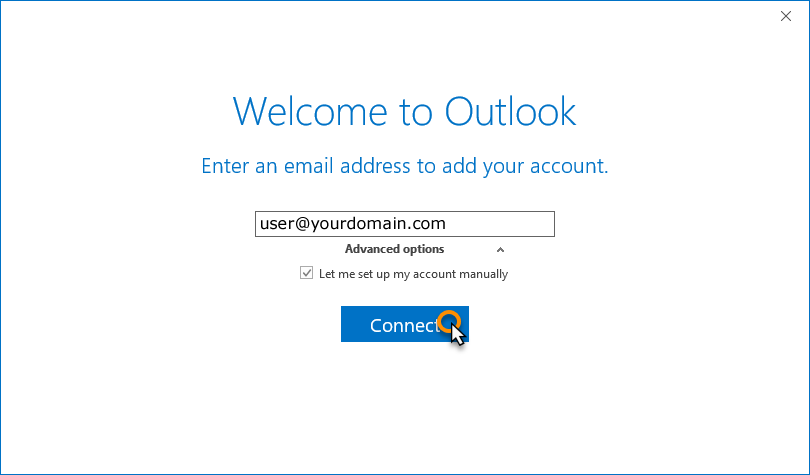
3. Check the box the box for the option Let me set up my account manually and then click Connect.
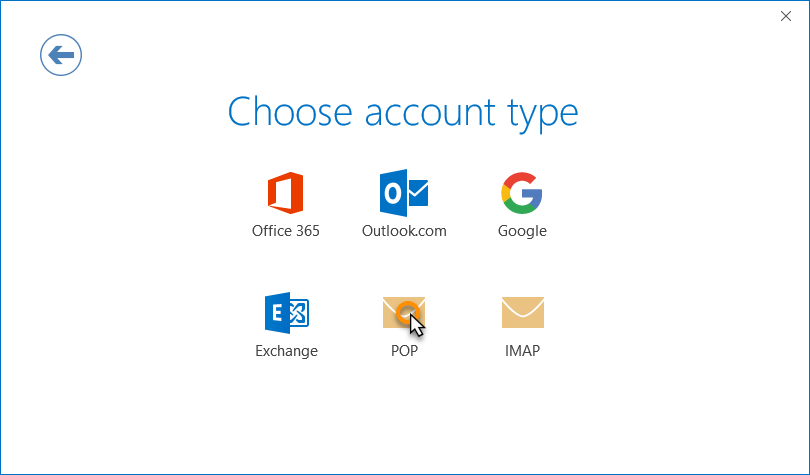
4. In the Choose account type window, select POP.
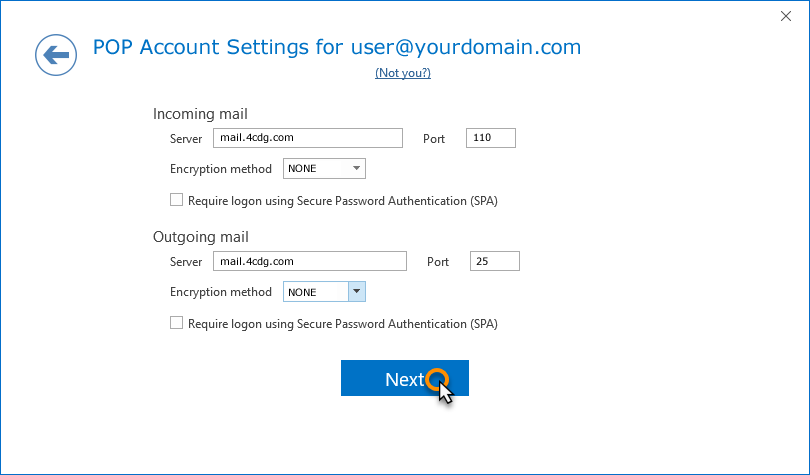
5. Enter the following settings then click Next:
Incoming mail:
Server: Enter mail.4cdg.com
Port: 110
Encryption method: NONE
Require logon using Secure Password Authentication (SPA): Unchecked
Outgoing mail:
Server: Enter mail.4cdg.com
Port: 25 or 587
Encryption method: NONE
Require logon using Secure Password Authentication (SPA): Unchecked.
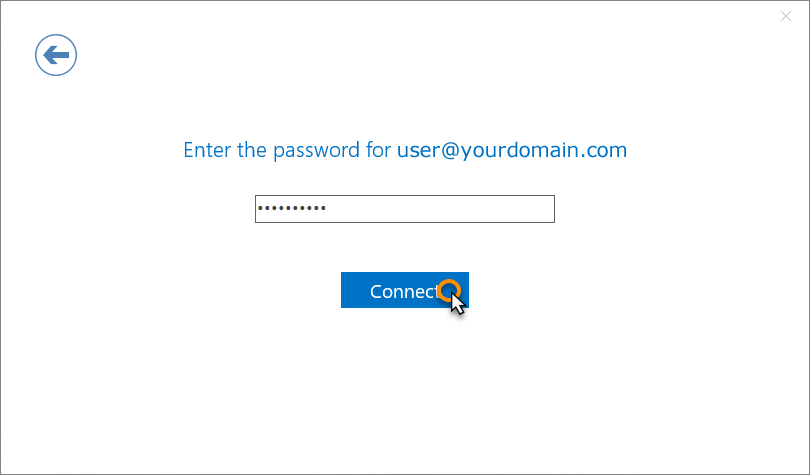
6. Enter your password and then select Connect.
Complete
Your account should now be set up and ready to use, click OK to close the wizard. Outlook 2019 is now configured to send and receive email through your mailbox.